
In today’s technology landscape, the ability to quickly automate processes using reusable components from various service providers is very powerful. No longer do you have to worry about writing complex applications, just get the right set of components and only worry about your particular process.
A common requirement is to convert files, or other data, to PDF as part of your process. Sometimes an MS-Word file that has just been approved needs to be converted to PDF, merged with another document, watermarked, secured and written to a record centre. Other times it is a matter of converting the content of a web page or database table to PDF.
So, lets see how we can leverage an existing 3rd party service, in the case the Muhimbi PDF Converter Online, to generate a PDF using my favourite Robotic Process Automation Tool, UiPath.
Muhimbi’s service supports many programming languages and environments. Because it exposes a ‘REST API’, integrating it into UiPath is relatively straight forward.
This series consist of the following parts:
- Generate PDFs using UiPath (this post).
- Creating a reusable UiPath activity (part 2).
- Using a custom PDF Conversion Activity in a real world UiPath workflow (part 3).
Before we begin, please make sure the following is in place:
- A Muhimbi PDF Converter Services Online Full, Free or Trial subscription (Sign up). Make sure you have your API key.
- Appropriate privileges to create a UiPath RPA workflow.
- Working knowledge of the UiPath Designer and ideally some C# experience.
Scenario: For this post we’ll consider a very simple scenario- when we ‘Select the file‘ it will be converted to PDF.
Your Final workflow will look like the screenshot below:

Step 1:
- Open The UiPath Studio and create a new Project of type, ‘Process‘.
- Give the new blank Process a meaningful ‘Name‘, ‘Location‘ and ‘Description‘ (optional) and click on ‘Create‘.

Step 2:
- In the UiPath Studio, click on The ‘Design‘ tab, ‘New‘ and select ‘Sequence‘.
- Give the ‘New Sequence‘ a ‘Name‘, ‘Location‘, and then click on ‘Create‘.

Step 3:
Create the ‘variables‘ with reference to the screenshot below.

Step 4:
Add the ‘Select File‘ activity in the ‘Sequence‘ and set it’s ‘Output‘ property by setting ‘SelectedFile‘ to the ‘varSourceFile‘ variable.

Step 5:
To Convert a file to PDF using the Muhimbi REST API, we need to pass the ‘File Content‘ as a ‘Base64 string‘ as well as the ‘File Name‘. In this step we will convert the file that we just selected into a ‘Base64 string‘.
Step 5.a:
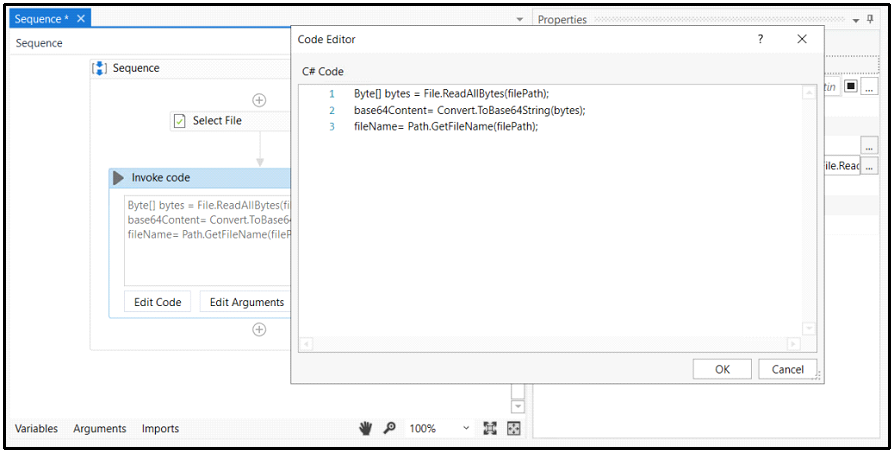
Add the ‘Invoke Code‘ activity and Set the ‘Language‘ property to ‘CSharp‘.

Step 5.b:
In the ‘Invoke code‘ activity, click on ‘Edit Arguments‘ and create the ‘Arguments‘ with reference to the screenshot below:

Step 5.c:
In the ‘Invoke code‘ activity, click on ‘Edit Code‘ and paste-in the following code:
Byte[] bytes = File.ReadAllBytes(filePath);
base64Content= Convert.ToBase64String(bytes);
fileName= Path.GetFileName(filePath);
Step 6:
Now that we have our ‘File name‘ and ‘File content‘, let’s create our JSON body / payload. To understand how to author a Muhimbi REST API request, please refer to the documentation. For this demo we will use the Convert end point.
A very simple ‘Schema‘ for the ‘Convert‘ Endpoint is as follows.
{
  "use_async_pattern": false,
  "source_file_name": "string",
  "source_file_content": "string",
  "output_format": "PDF",
  "fail_on_error": true
}
Step 6.a:
Add the ‘Invoke code‘ activity and set the ‘Language‘ property to ‘Csharp‘.

Step 6.b:
In the ‘Invoke code‘ activity, click on ‘Edit Arguments‘ and create the ‘Arguments‘ with reference to the screenshot below:

Step 6.c:
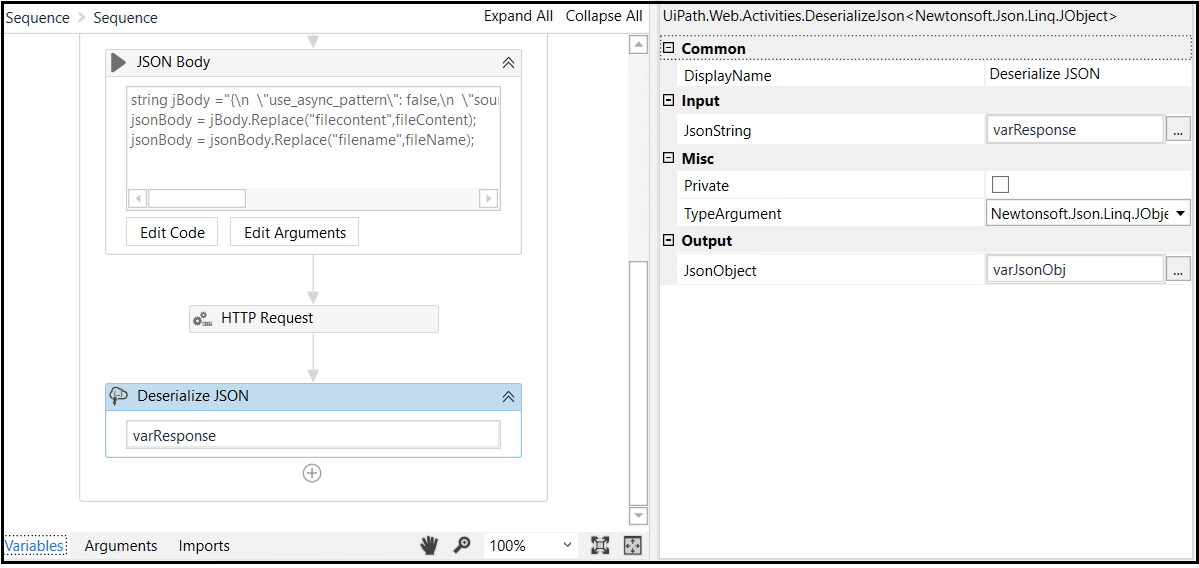
In the ‘Invoke code‘ activity, click on ‘Edit Code‘ and paste-in the following code.
jsonBody = "{\n \"use_async_pattern\": false,\n \"source_file_name\": \"" + fileName + "\",\n \"source_file_content\": \"" + fileContent + "\",\n \"output_format\": \"PDF\",\n \"fail_on_error\": true\n}";

Step 7:
In this step we will author the ‘HTTP Request‘.
Note: If the ‘HTTP Request‘ action in not available, you might have to add the action by searching for ‘Uipath.web.activities‘ and then click ‘Search in available packages‘ in the ‘Activities‘ pane.

- Add the ‘UiPath.Web.Activities‘ package and click ‘Install‘ and ‘Save‘.

Step 7a:
Add the ‘HTTP Request‘ action. Upon adding the action, the ‘HTTP Request‘ wizard opens.
Configure the activity with reference to the details below:
- End point: https://api.muhimbi.com/api/v1/operations/convert
- Timeout: 600000
- Request Method :POST
- Accept response as : JSON
- Parameters: Click on “Add Header”
- content-type: application/json
- api_key:<your_muhimbi_api_key>

Step 7b:
Click on the ‘HTTP Request‘ activity.
- The ‘Properties‘ blade opens.
- In the ‘Properties‘ pane, under the ‘Options‘ section for the ‘Body‘, assign it the ‘varJsonBody‘ variable.

Step 7c:
Click on the ‘HTTP Request‘ activity.
- The ‘Properties‘ blade opens.
- In the ‘Properties‘ pane under the ‘Outputs‘ section for the ‘Result‘, assign it the ‘varResponse‘ variable.

Step 8:
Add the ‘Deserialize JSON‘ activity to the sequence.
- Set the ‘JsonString‘ property to the ‘varResponse‘ variable.
- Set ‘TypeArgument‘ to ‘Newtonsoft.Json.Linq.Jobject‘
- Finally, set ‘JsonObject‘ to ‘varJsonObj’ variable.
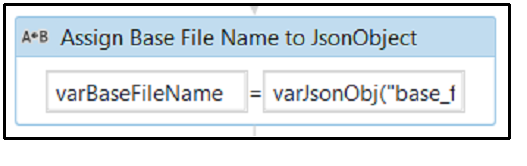
Step 9:
Add the ‘Assign‘ activity to the ‘Sequence‘, then assign the ‘varBaseFileName‘ variable to ‘varJsonObj(“base_file_name”).ToString‘ as shown below:
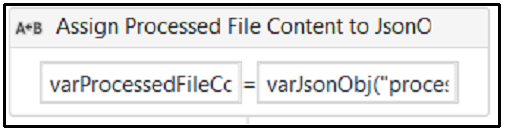
Step 10:
Add the ‘Assign‘ activity to the ‘Sequence‘, then assign the ‘varProcessedFileContent‘ variable to ‘varJsonObj(“processed_file_content”).ToString‘ as shown below
Step 11:
To ensure that we have the ‘Processed File Content‘ as a ‘Base64 sting‘, we need to convert it into a byte array and write the file back to the Folder.
Step 11 a:
First, add the ‘Invoke Code‘ activity and Set the ‘Language‘ property to ‘CSharp‘.

Step 11.b:
Second, in the ‘Invoke code‘ activity, click on ‘Edit Arguments‘ and create the ‘Arguments‘ with reference to the screenshot below:
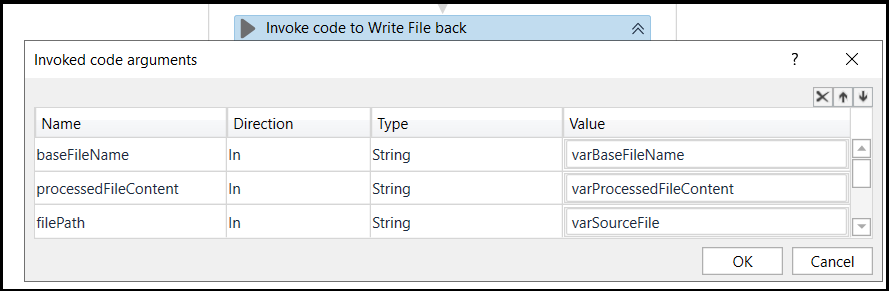
Step 11.c:
Third, in the ‘Invoke code‘ activity, click on ‘Edit Code‘ and paste-in the code below:
string path = Path.GetDirectoryName(filePath);
Byte[] bytes = Convert.FromBase64String(processedFileContent);
string outFilePath = path + "\\"+ baseFileName +".pdf";
File.WriteAllBytes(@outFilePath, bytes);

That’s it- you’re done! Run your File from The UiPath Studio. After a short wait, you will see a new PDF file in the same directory as the source file.
With the basics explained, in the next blog post we’ll create a reusable ‘Convert to PDF‘ activity and use it in our workflow.
Subscribe to this blog for the latest updates about SharePoint Online, Power Automate (Microsoft Flow), Power Apps and document conversion and manipulation.

Like!! Great article post.Really thank you! Really Cool.
LikeLike
Great Tutorial! Thanks.
Would it also be possible to create readable/searchable PDFs like this?
LikeLike
Muhimbi PDF Converter converts files to PDF format it makes sure that all text in the source document is included to make sure PDF files are fully searchable using PDF Readers and indexable by search engines such as Windows Desktop Search and SharePoint Search (Providing Adobe or Foxit iFilters are installed to extract the content).
LikeLike
Definitely helpful for me, thanks for sharing
LikeLike