
In my previous blog, “Solving ‘exceeded the maximum size’ when working with images in Power Automate,” I took a deep dive into the complexities of managing large image files and overcoming the challenges posed by file size limitations. Today, I bring you a simpler, more streamlined solution.
In this blog, I will guide you through a workaround that eliminates the need for Graph API to generate thumbnail links for images stored in SharePoint. This approach not only makes it easier to manage your images but also simplifies the process of converting them to PDF, all while avoiding the dreaded size limitations. Whether you’re a seasoned Power Automate user or just getting started, this guide will provide you with practical steps to enhance your workflow and make your tasks more efficient. Credits to Dhanashree and the Binary roots team for sharing the idea.
Pro Tip: If the Images are already of low resolution please filter the larger images using File Size using the “Get File Metadata” action, you can find more details at link.
So, without further ado, let’s dive into building the solution step-by-step.
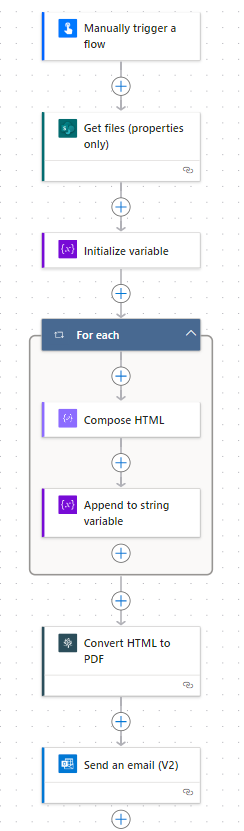
Step 1: Manually Trigger a Flow
- Click on “Create” and select “Instant cloud flow.”
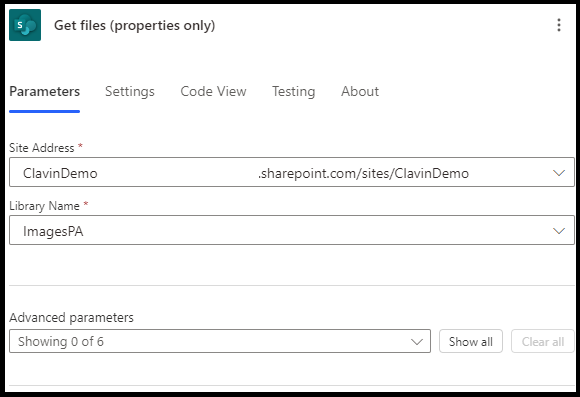
Step 2: Get Files (Properties Only)
- Site Address: Your SharePoint site address.
- Library Name: The name of your document library.
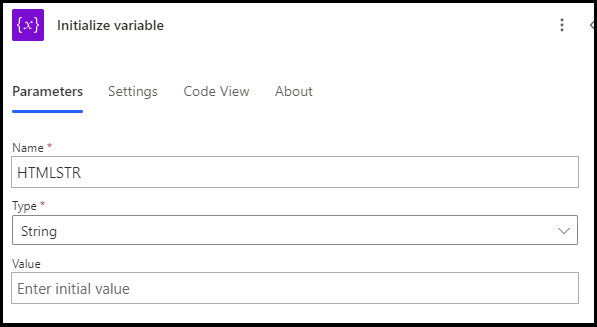
Step 3: Initialize Variable
Initialize Variable variable of type String and give it a Name ‘HTMLSTR’
Step 4: Inside the “Apply to each” add Action – Compose:
- Configure the action:
- Inputs: Use the following expression to create an HTML string that includes the extracted medium thumbnail URL
<div>
  <p></p>
  <img src="@{item()?['{Thumbnail}']?['Medium']}" alt="TEST" />
</div>
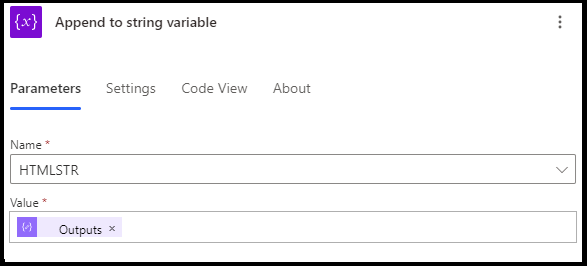
Step 5: Inside the “Apply to each“ add Action – Append to string variable:
- Configure the action:
- Name:
HTMLSTR - Value: Use the output from the “Compose HTML” action.
- Name:
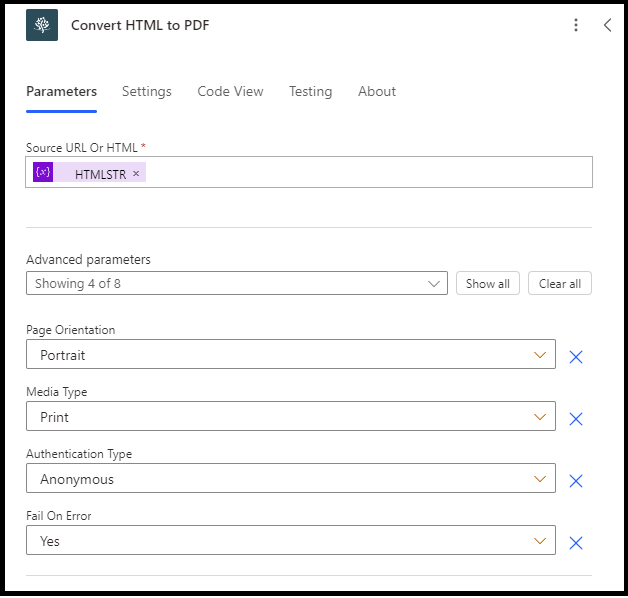
Step 6: Outside the “Apply each loop” add the Muhimbi “Convert to PDF” action.
- Source URL or HTML : Use the output from the “Append to string variable” action.
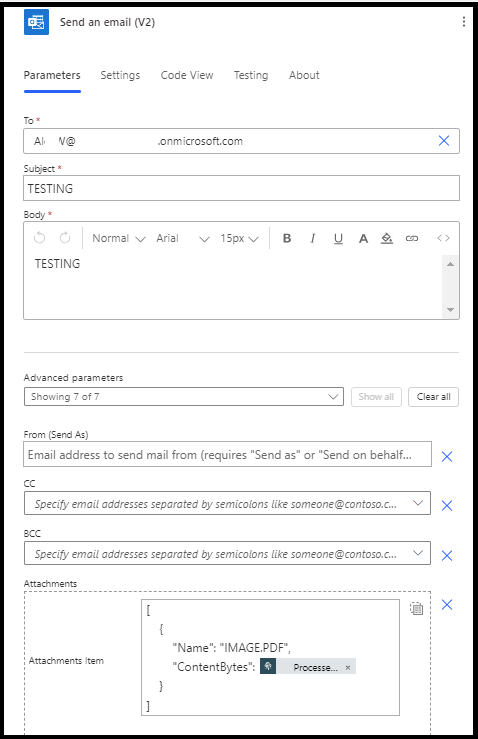
Step 7: Add the “Send an email action” and add the mandatory fields.
- To: “Email” address of the user
- Subject: TEST
- Body: TESTING
- Attachments Name – 1: “User name”.pdf the output of the “For a Selected File”
- Attachments Content -1: “Processed File Content” the output of “Convert documents” action.
All Done! Trigger the Flow manually and after a few seconds, you should have an email with a PDF attachment which includes all the Images.
Subscribe to this blog for the latest updates about SharePoint Online, Microsoft Flow, Power Apps, and document conversion and manipulation.
